Hardware and Devices
Inkplate 10
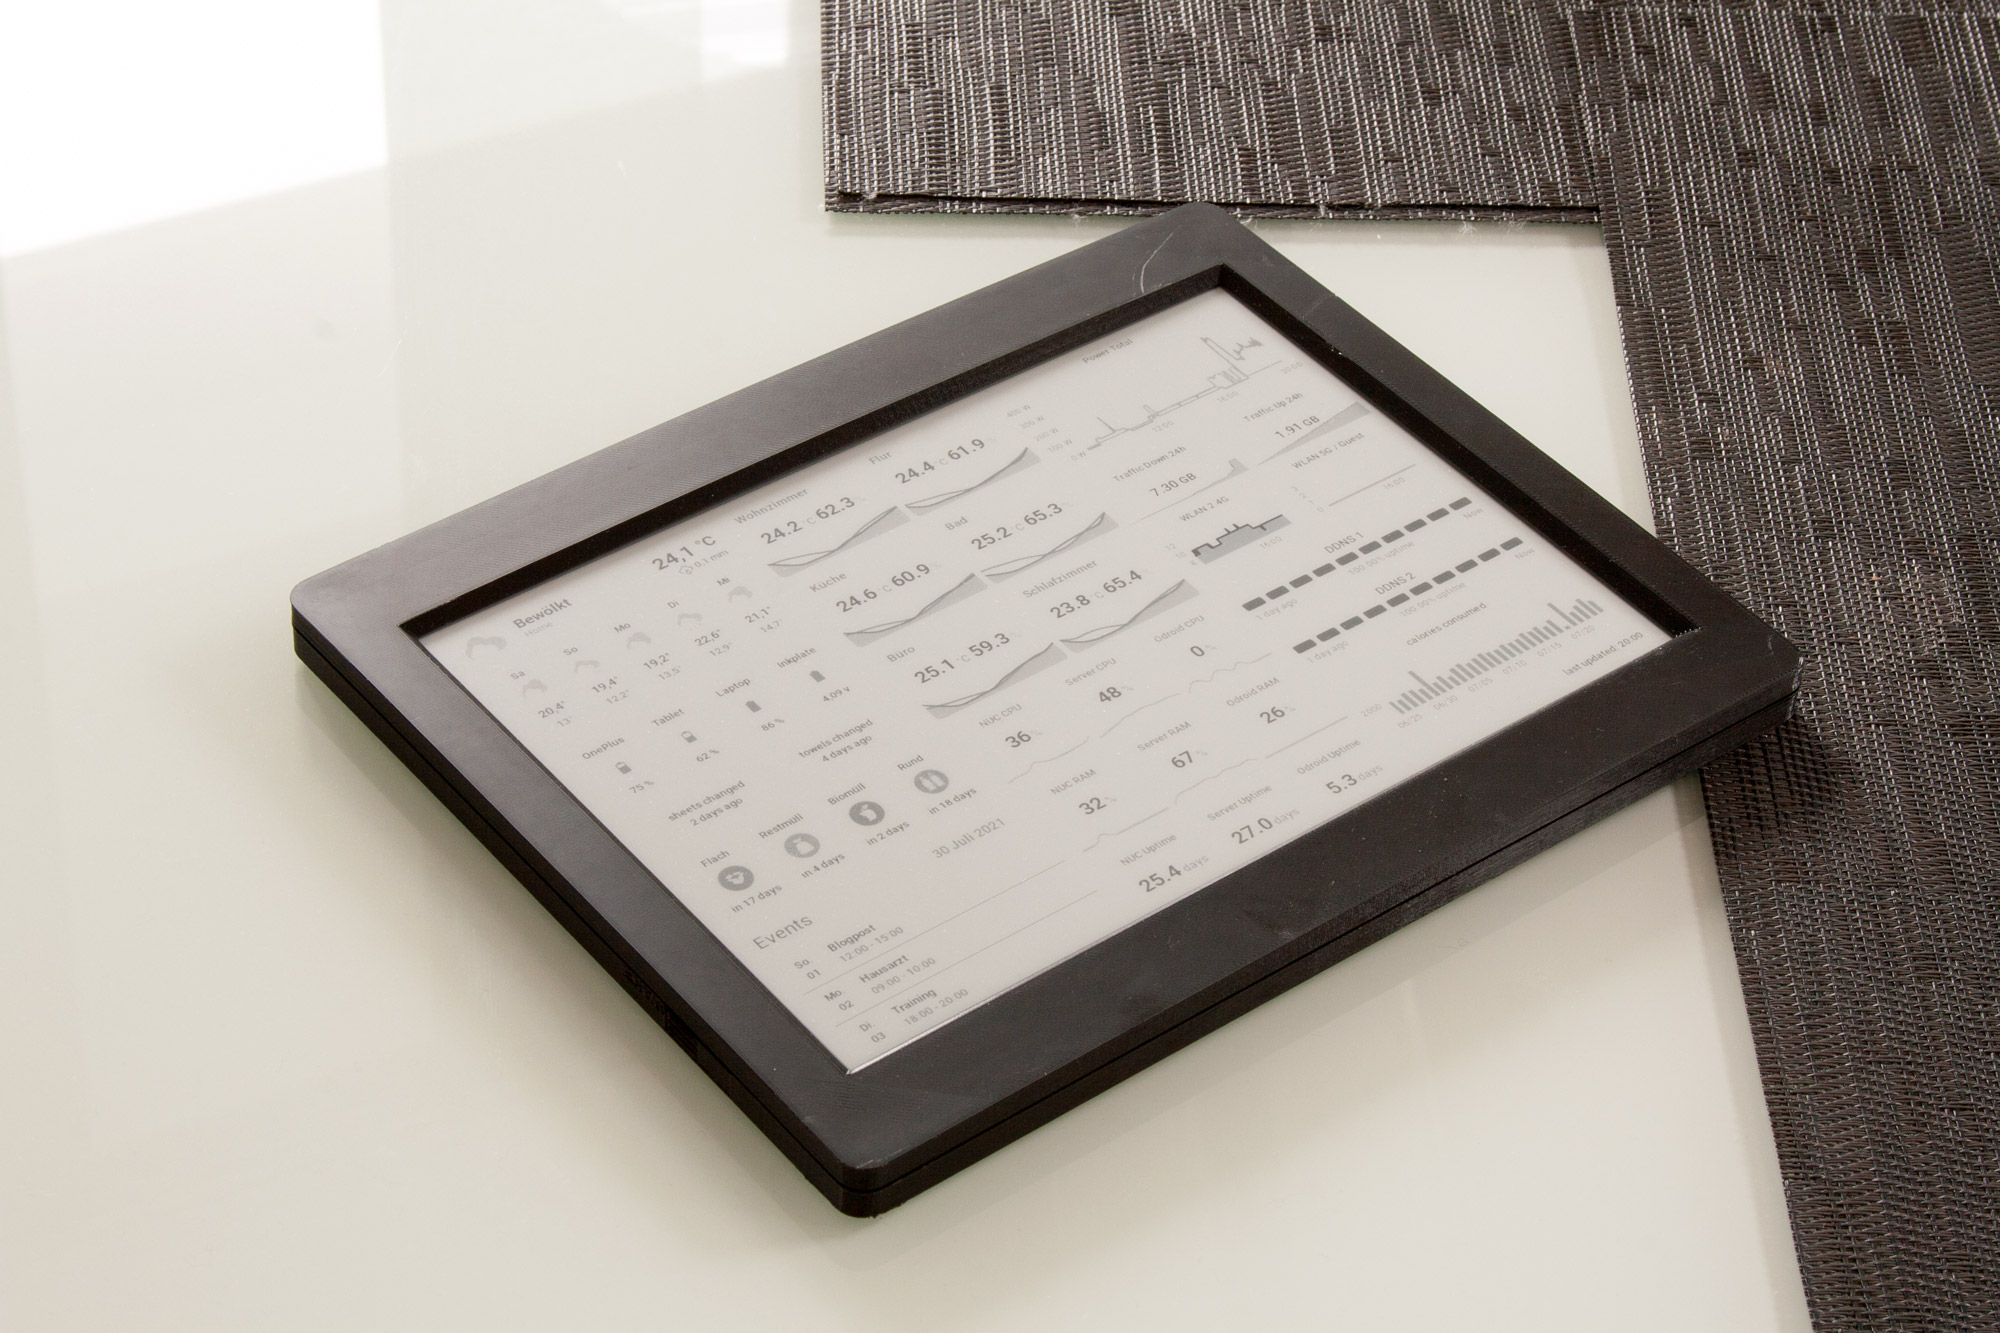
The Inkplate 10 is a 10″ e-ink display which was crowdfunded by e-radionica on crowdsupply, featuring an ESP32 microcontroller. There were 2 options available for backers, I chose the one coming with the included 3d-printed case. The case itself is quite good, there are buttons for power, an opening for the sd-card and it features holes on the backside to mount it on the wall. However the material seems rather cheap and the case was already a little scratched. Moreover the capacitive buttons to interact with the inkplate on the center bottom are blocked which is unfortunate, but not necessary for my use case.
Battery
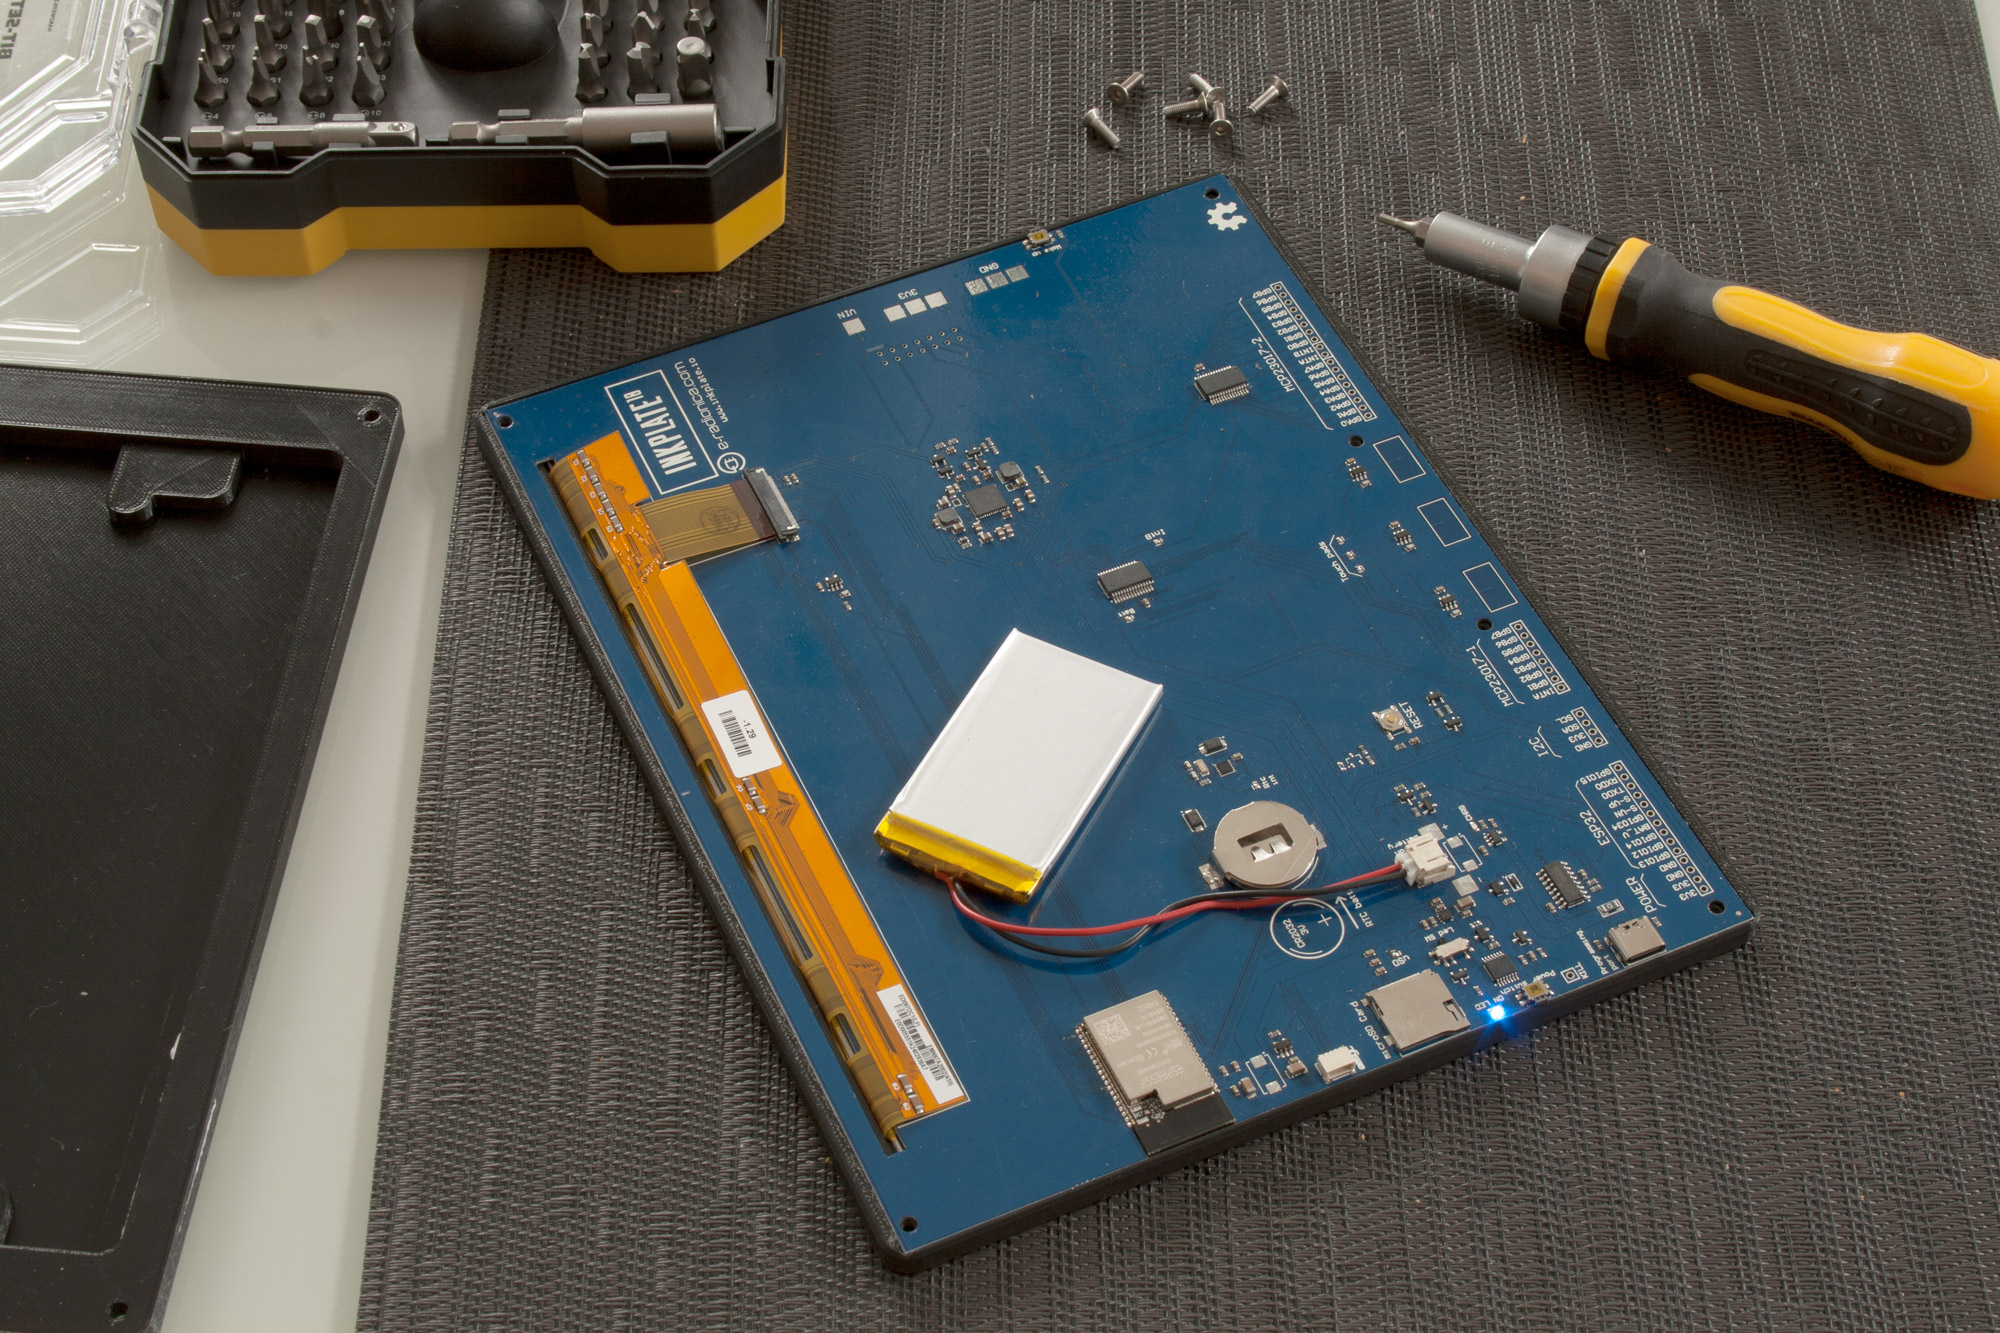
The backside features a few screws so it’s easy to open up. I did not tinker a lot with it, but I installed a battery to make it portable – but you’re always free to power it by the USB-C port on the righthand side. The battery connector is JST-PH port. I had no prior experience with anything battery powered on the microcontroller side. I decided to get a battery to fit in the case. I stumbled across a post on the e-radionica forums, which explained the maximum a battery would fit. The only one available in a fitting size with a acceptable power delivery was a 1200 mAh one. I also got a 2500 mAh one just to see if it would fit – but well, it did not, by a few milimeters. The battery can be just inserted into the JST port and because this battery fits snugly it does not move when closed up. The Inkplate also features a charger which will charge the attached battery once a USB-C power source is connected. Neat. As of now I did not need to recharge it. The following screenshot displays the battery for the last few weeks.

My rough guess would be that it lasts 4 weeks, but this also heavily depends on the use case. As explained in a part further down the road I refresh it every 20 minutes to display an image over WLAN and then put it back to sleep.
Intel NUC
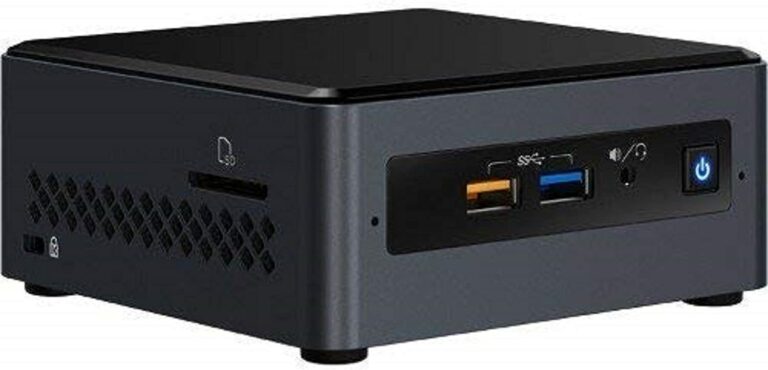
The dashboard displayed is just a lovelace view of Home Assistant in kiosk mode (fullscreen). Home Assistant is hosted as in the Docker container core version on my Intel NUC NUC7PJYH2, a fairly cheap NUC with an quad core Intel Pentium Silver J5005 (there’s also a dual core model) with 16 GB RAM and a 512 GB SSD. Although the NUC is not very fast, it handles it’s tasks quite well. Besides Home Assistant there are two dozen other services running, many not necessary for the Inkplate dashboard, but for other home automations. You obviously can use a Raspberry Pi for Home Assistant, but for me a Raspberry Pi probably cannot handle all the load I throw at it with additional services and image rendering.
IoT and Sensors
The Inkplate and the NUC are the two devices used to display the dashboard. Although using this workflow any image can be displayed on the Inkplate. Creating my own dashboard I was in need for some more hardware (IoT devices). There are Kasa HS110 power plugs, a Zigbee USB adapter and a few Zigbee IoT devices.
Kasa HS110
I already owned 2 of these smart power plugs which can display the power usage. The plugs are connected by WLAN and thus are not in need for a central command station as the Hue Bridge or anything like that. When I started out this seemed to be the most cost efficient way to monitor power draw. There are newer devices from the TP-Link Kasa brand, which may or may not work with my approach to get the readings outside of the official Kasa mobile app. I may switch to some Zigbee power plugs in the future.
Zigbee USB adapter
The Zigbee protocol is quite famous in everything smart home related. Many manufacturers leverage the power of Zigbee for their own ecosystem (e.g. the Hue system from Philips). As there are many devices and brands out there, it’s easy to build a system yourself. All you need is some kind of Zigbee adapter to communicate with the devices. On the software side I’m using Zigbee2Mqtt which features a great list of supported adapters. I’m using the Electrolama zig-a-zig-ah! (zzh!) which can be found on top of the recommended devices. This way you can also communicate with the Philips Hue devices.
I’ve also got a better antenna to boost the signal. The one I got from ebay is a 6dBi antenna designed for 2,4Ghz. It depends on which adapter you get, but with the zzh! I needed a male connector on the antenna – a female connector will not work with the zzh! adapter (most antennas are female as far as I know, so chances are, if you do not check it, you will buy a female one). So make sure the antenna you’re buying has a little pin coming out of the connector, if your adapter requires it.
This allowed me to boost my signal to about 20 additional lqi compared to the antenna it came with. That beeing said, the range of the adapter is quite bad. Zigbee is prone to interference from 2,4Ghz WLANs and other signals, but I never imagined it to be that bad. I can hardly cover every room in my apartment, although the adapter sits in the center with this boosted antenna. It’s quite a step up from some $5 Sonoff Zigbee USB adapters sold on Aliexpress. They work – but they are not working stable and their range is worse. On the plus side: the zzh! with Zigbee2Mqtt is really stable for me. My only issue is range.
Zigbee devices
I’m using a few different devices with Zigbee. Prior to me installing the dashboard I’ve purchased Philips Hue, which are working great, but are not part of the dashboard itself. For the dashboard I got SONOFF SNZB-02 which measure temperature and humidity. I’m also using a few other devices which are not part of the dashboard, but which I can recommend: the Aqara motion sensors (RTCGQ11LM) for detecting motion and triggering the Hue lights and a Honeywell smoke sensor. All those Zigbee devices are way cheaper on Aliexpress compared to e.g. Amazon.
Internet
To display the internet traffic and LAN devices I’m making use of a Fritzbox, which was quite a hassle to get the data from. I would really love to have a Router with SNMP, as there are much more usable data and easier usage of said data, but unfortunately I’m stuck with the Fritzbox.
So this is all the hardware I’m using for the dashboard. In the next part I will describe the architecture of my setup and how I designed my approach.
Interesting
Thank you for sharing this excellent write up of creating an e-ink smart home kiosk. I particularly enjoyed the architecture diagram.